This site contains affiliate links. Please view the full disclosure for more details.
Most beginner makeup artist kit guides are bloated with trendy products or vague lists. As a new MUA, that noise is exhausting—and expensive. You’re here because you want clarity, not chaos. And I’ve got chu!
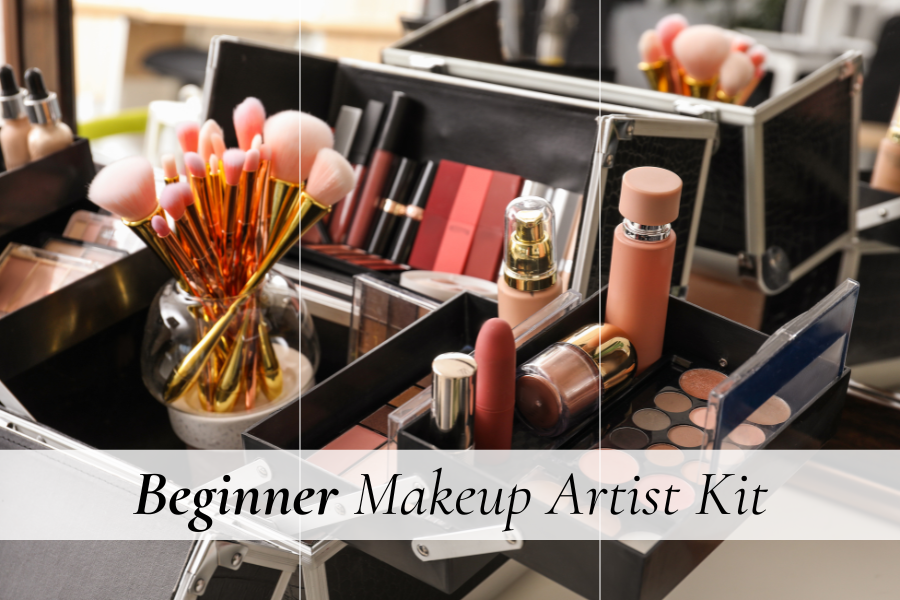
This is it! You’ve finally decided to make the move and take your passion for makeup to become a makeup artist. There’s just one thing you’ve gotta do first: build your professional makeup artist kit!
“I don’t know which ones are the best products out there.”
“I’m on a tight budget.”
“I don’t know what to buy first.”
I hear you! Everywhere you look, there’s always gonna be someone recommending products. You can’t just waste your money on what’s hype! No. You’ve gotta be wiser than that.
Without the right kit, you’ll end up digging for that one mascara at the bottom of your bag. You’ll feel less confident, appear disorganized, and struggle to tap into your creative flow—all of which are essential for gaining your client’s trust!
The good news? You don’t need every trending product to build a client-ready makeup kit. In this guide, you’ll learn about professional makeup artist kit, makeup artist kit essentials, basic makeup kit for beginners on a budget, makeup artist kit for beginners, makeup artist kit organization, makeup artist needs, and how to keep everything organized with a free tracker! *wink, wink*
Whether you’re just starting or transitioning from a hobbyist to a pro, this guide will help you build your kit, work confidently, and impress your clients with your organization and expertise.
This post is all about the ultimate beginner makeup artist kit guide.
Beginner Makeup Artist Kit
1. Makeup Artist Kit Bag
I used to head over to my friend’s place to do her makeup for my portfolio, lugging a beach bag with my makeup towel on one shoulder, my sling bag with my wallet and phones on the other, and my personal makeup bag filled with my professional kit in both hands.
And yes, all of this while commuting by train. Needless to say, my arms were D-O-N-E by the end of that session. Definitely not the vibe!
Listen, before you start stocking up your kit with products, start with a solid foundation—literally, the kit itself. A sturdy, reliable makeup artist bag that keeps your tools secure and organized will not only make you feel more confident, but it’ll also help you look polished, not frazzled, on your commute.
When I finally had enough to invest, I went with this sleek makeup kit bag from Relavel. ⬇

It’s perfect for beginner makeup artists since it’s small and you won’t feel pressured to fill it as you might feel if you buy an overwhelmingly large and deep makeup artist bag. Plus, you can conveniently make it a side bag, a backpack, or stack it on a trolley luggage.
You can always upgrade to larger ones when you feel like you’ve outgrown your makeup bag and it can no longer serve you in the kind of career you’re moving forward. But as of now, a compact PRO makeup kit bag like this will be enough for you.
2. Sanitization and Hygiene
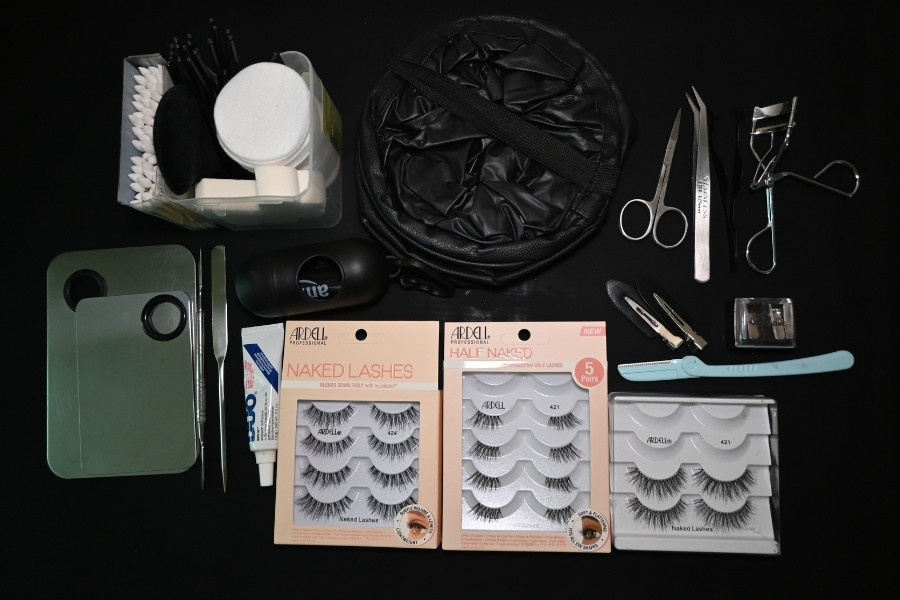
If there’s one thing that separates a professional from a hobbyist, it’s how serious you are about hygiene!
Your clients trust you not only to make them look flawless but also to keep their skin safe from infections and breakouts. That’s why sanitization is non-negotiable.
Stock your kit with these tools:
Trust me, it’ll go a long way in maintaining your credibility and keeping your clients feeling secure. Clean tools mean happy skin—and happy skin means happy clients!
3. Skincare for Every Skin Type
Here’s the thing: your makeup will only look as good as the skin underneath. That’s why having a mini skincare kit that caters to different skin types is absolutely essential. When your clients’ skin is well-prepped, it not only ensures a flawless makeup application but also leaves them feeling pampered and confident.

Cleansers
Start with a gentle cleanser that works for all skin types. I recommend Cetaphil Gentle Cleanser. It’s soothing, effective, and doesn’t strip the skin—perfect for prepping your client’s skin without irritation.
Toners
Follow up with a good toner to balance the skin and remove any lingering impurities. A micellar water, like Embryolisse Micellar Lotion, is a great option. It’s gentle, refreshing, and won’t dry out the skin, which is a win for both oily and dry skin types.
Face Moisturizers
Next, you’ll want to moisturize according to your client’s skin type. As someone who tends to have oily skin, I swear by the Neutrogena Hydro Boost Water Gel—it’s lightweight and hydrating without adding shine. For dry skin, the Embryolisse Lait-Crème Concentré is a go-to. It delivers that rich hydration while creating a smooth base for makeup.
Insider Tip: You Don’t Always Need Primer!
Many pro makeup artists (myself included) skip it. Instead, we carefully assess our client’s skin and pick either a water-based or oil-based moisturizer depending on their needs. That acts as our primer and creates a perfect base for makeup—hydrated, smooth, and prepped!
Lip Moisturizers
And don’t forget the lips! A basic lip balm is great for everyday use, but if your client has dry or chapped lips, use a little Fresh Sugar Lip Polish before applying their lipstick. Gently exfoliate and wipe off before starting the lip makeup to ensure a smooth application.
You can also use any good lip balm. Find a cheap one you already love and that’s performing well on your lips. You don’t always have to stock your kit with the fanciest brands to be professional. What matters most is that it works.
Right now, I use the Seba Med Lip Balm SPF 30—affordable, soothing, and packed with sun protection. It glides on smoothly, doesn’t interfere with lipstick, and keeps lips looking soft and hydrated.
As long as it prevents flaking and holds moisture under lip products, it deserves a spot in your kit.
4. Pro-Level Eye Makeup Kit
Let’s be real—your eye makeup kit is where the fun really begins! It’s your chance to play with color, shape, and style, whether you’re creating a natural look or something bold and dramatic. But when you’re starting out, you don’t need a million eyeshadows or eyeliners to make magic happen. You just need the right essentials.
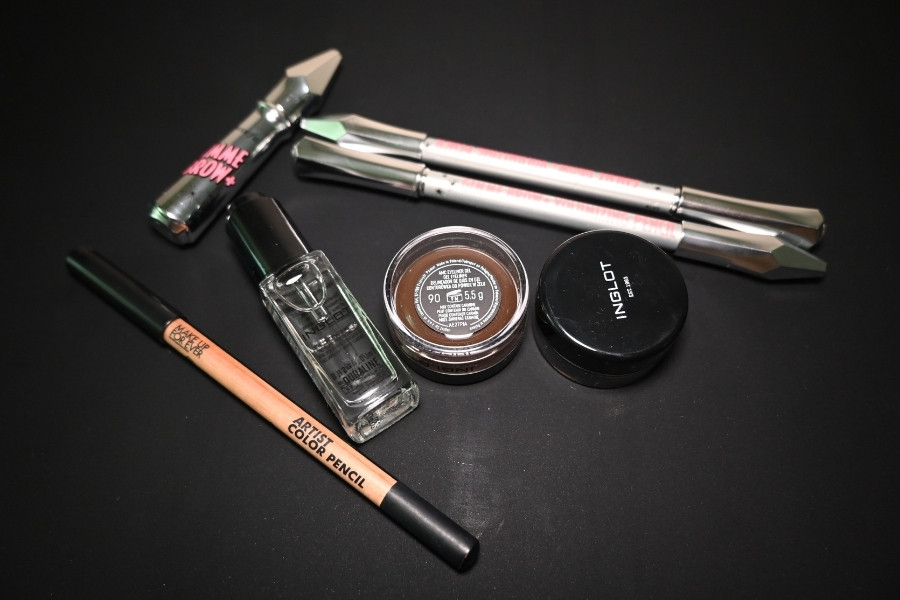
Here’s what should be in your pro-level eye makeup kit:
Eyebrow Gel/Soap
Well-groomed brows can completely transform a look. Keep them in place with the Inglot Playinn Soap Brow, which holds the brows perfectly while maintaining a natural finish—no stiff or overdone look here!
Eyeshadow Palette
Start with a versatile palette that covers all your bases—neutral tones and a few bold pops of color. One of the best eyeshadow palettes for beginner makeup artists is Anastasia Beverly Hills Soft Glam Palette. It’s a crowd favorite. It’s perfect for everything from soft bridal looks to bold editorial styles, and it transitions seamlessly from day to night.
If you’re after more options, let me share the first palettes I bought for my professional kit: the Natasha Denona Glam Eyeshadow Palette for cool-toned looks and the Natasha Denona I Need a Warm Eyeshadow Palette for those warmer vibes.
If you’re into editorial looks, the palettes I mentioned earlier already work beautifully. But if you’re craving bold pops of color, check out the eyeshadow palettes from Rude. Their shades are fun, loud, and seriously long-wearing. The Roaring 20s Eyeshadow Palette – Neons is my personal fave!
These palettes will give you the flexibility to create a wide range of looks while you discover what kind of makeup artistry you really want to dive into!
Pro tip: You can also use the black, grey, or cool-toned browns in these palettes as your eyebrow shade.
Eyeliner
When you’re just starting out, I definitely recommend sticking to pencil eyeliners. They’re incredibly versatile and way easier to control—perfect for beginners. Honestly, I still struggle with winged liner sometimes, so I can imagine how tough it must be to get those crisp lines with liquid when you’re just starting out!
Pencils, on the other hand, give you the flexibility to create clean, precise lines or smudge them out for a softer, smoky effect. A good black pencil eyeliner is a must-have in your kit—you’ll find yourself reaching for it again and again.
If you want to kick things off with a solid all-in-one option, the Mini Artist Color Pencil Lipliner & Eyeliner Kit from Makeup For Ever is a fantastic choice. These pencils are beginner-friendly and multi-purpose, so you can use them on both your eyes and lips. It’s an easy, budget-friendly way to experiment with different looks without being overwhelmed by too many products.
Once you’re more confident, you can always add liquid liners for those bolder, more dramatic styles. But for now, pencils are your go-to!
Mascara
To complete your eye looks, choose a mascara that adds volume without clumping. There are plenty of great drugstore options that do the job well. My favorites are the Maybelline Lash Sensational Sky High Waterproof Mascara and the L’Oréal Paris Voluminous Panorama Mascara. These give your clients full, dramatic lashes without the mess.
And since your clients might be crying or sweating throughout the event, go for waterproof formulas to keep everything in place!
Lashes
Never underestimate the power of a sturdy eyelash curler and high-quality lash glue for falsies. Ardell 421 lashes will become your bestie for that natural yet glam look. Pair them with Ardell Duo Lash Glue for a firm, long-lasting hold.
Eyeshadow Primer
To be honest, you can skip eyeshadow primers and use a concealer instead—it works just as well to keep shadows in place. But if you prefer to use a primer, I’d recommend Urban Decay Primer Potion. It’ll help lock in your eyeshadow and prevent creasing, ensuring your client’s eye look stays flawless all day.
5. Concealers
Concealers are a makeup artist’s secret weapon. Whether you’re tackling dark circles, redness, or blemishes, the right concealer can be a total game-changer. A well-chosen concealer can brighten, conceal, and even out the skin, making your client’s complexion flawless.
It’s important to stock a variety of shades so you can mix and match to suit different skin tones. Two crowd favorites I highly recommend are the NARS Creamy Radiant Concealer and the Too Faced Born This Way Concealer. Both offer excellent coverage and blend seamlessly into the skin without looking cakey.
Now, here’s a tip: you can totally color-correct using your concealers. For example, a peachy shade like “Honey” from NARS works wonders to neutralize dark circles with blue and purple undertones. This way, you’re not just covering up the darkness but actively correcting the tone underneath.
But if you need more intense color correction—especially for stubborn discolorations—you may want to invest in a dedicated color correction palette. The MAC Studio Fix Conceal and Correct Palette is a solid choice. It offers a variety of hues, from peach to green, that neutralize various skin concerns.
6. Foundations
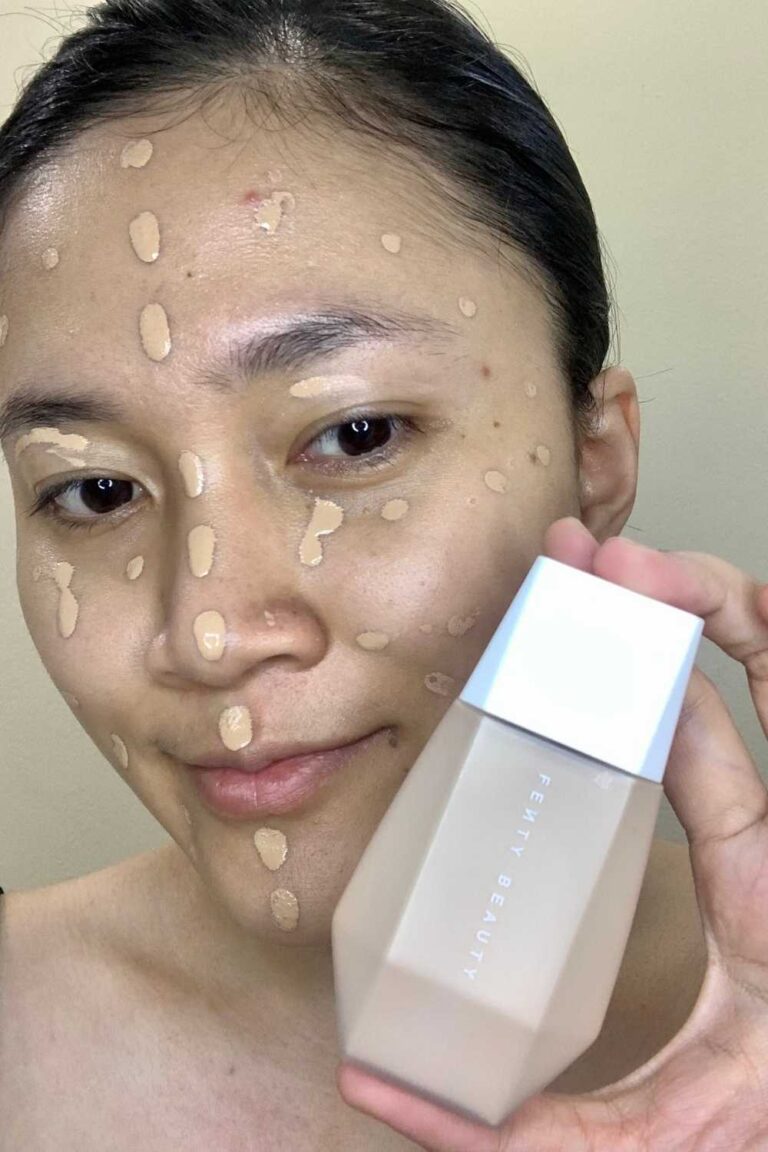
When it comes to foundations, there’s no need to overwhelm yourself with 50 different shades right out of the gate. The trick is to start with a small range of light, medium, and dark shades, which you can mix to create custom matches for your clients.
This not only saves you money but also keeps your kit compact and manageable while you’re still figuring out your groove. I suggest starting with foundation palettes like the MAC Pro Palette Full Coverage Foundation or MUFE Skin Face Essentials Palette. These palettes offer flexibility, allowing you to blend shades for a personalized match for every client.
As you grow more confident in your artistry and get more clients, you’ll naturally discover which foundation formulas and shades work best for you. When you’re ready to reinvest in your kit—and trust me, you’ll get there—it’s a fun process of testing and experimenting in stores like Sephora to see which full-sized foundation bottles you want to add next.
7. Setting Sprays and Powders
After perfecting the foundation, the next step is setting it all in place so your hard work stays flawless throughout the day, whether your client is heading to a wedding, photoshoot, or event.
Setting Powders
The key to long-lasting makeup is locking everything down with a good setting powder. This not only keeps makeup in place but also helps control shine, especially in the T-zone. When choosing a setting powder, go for something that works for all skin types and offers a lightweight, natural finish.
I love the MAC Studio Fix Pro Set + Blur Weightless Loose Powder. It’s a true multitasker that blurs imperfections while keeping oily areas under control. The fine, weightless texture ensures that it doesn’t look cakey or settle into fine lines—plus, it’s perfect for touch-ups throughout the day without adding heaviness.
Setting Sprays
Now that you’ve set everything with powder, it’s time to lock it in with a setting spray. While powders do a great job of controlling shine and holding makeup in place, a setting spray adds an extra layer of protection—especially in humid or outdoor conditions.
My go-to recommendation for this is the Kryolan Fixing Spray. It’s an industry favorite, and for good reason—it literally makes your makeup not go away. This spray seals the makeup, ensuring it lasts all day and night, even through sweat, tears, and anything else the day might throw at you. Whether your client is dancing at a reception or posing under hot studio lights, you won’t have to worry about their makeup fading or smudging.
8. Bronze and Contour Palettes
Shaping and defining the face is where the magic happens after you’ve evened out the skin with foundation. Contouring adds structure, while bronzing brings warmth and a healthy glow. For a well-balanced look, your contour and bronzer palette should have a mix of cool and warm tones to suit a variety of skin undertones.
One product I swear by is the MAC Studio Fix Sculpt and Shape Contour Palette. It’s a fantastic option, offering different shades that allow you to chisel out cheekbones or add a soft bronzed warmth with ease.
9. Blush and Highlighter Palettes
Once you’ve sculpted the face, it’s time to add some color and glow! Blush is the perfect way to bring life back to the complexion after foundation and contouring. When choosing blushes for your kit, aim for a mix of shades that flatter a range of skin tones—from peachy pinks to deeper mauves.
NARS makes some of the best blushes out there, both in powder and liquid forms. A couple of client favorites are the shades Orgasm and Deep Throat—yes, I know, funny names, but the colors are universally flattering.
As for highlighters, choose something buildable, so you can cater to clients who want either a subtle glow or a more intense shine. The Dior Backstage Glow Face Palette is a fantastic choice, allowing you to add that perfect pop of glow without going overboard. It gives you control over how much luminosity you want to bring into the look.
10. Lip Products
The final touch? Lip products! Lipstick can completely transform a look and bring it all together.
When building your beginner makeup artist kit lip product selection, start with the basics—nudes, reds, and pinks—so you’re covered for any occasion or client preference. A versatile range of shades will ensure you can create everything from a natural daytime look to a bold, dramatic evening glam.
The MAC Lipstick range is a great starting point. Their lipsticks are known for their pigmentation, longevity, and range of finishes. Pair them with Charlotte Tilbury’s lip liners and lipsticks for a smooth, defined lip that lasts.
You can also play with textures—have a few matte and creamy formulas on hand to cater to different client tastes.
Don’t forget glosses! A good gloss can elevate a look from simple to stunning. The MAC Lipglass is a must-have—it’s versatile and adds just the right amount of shine. Plus, it can be layered over any lipstick for extra dimension.
11. Makeup Brushes and Tools
If you already have a set of professional makeup brushes from the academy you enrolled in, that’s good to go! You don’t need multiple sets of brushes when you’re just starting out. I have mine from the Academy of Freelance Makeup (AOFM) and they are sturdy, fluffy, and have that professional look.
If you don’t have a set of brushes yet, I’d recommend you choose a set of brushes that can complete a makeup look seamlessly. This Morphe MUA Life will do the job right or you can check what kinds of brushes this set has and try to select the same from other brands or your local store.
Bonus Tip: How to Expand Your MUA Kit Essentials
Remember, you don’t need to buy everything at once! Start with your essentials, then build out as you work with more clients. Use your earnings to reinvest in your kit.
As your confidence grows, so will your beginner makeup artist kit! The key is to always keep upgrading without feeling like you need to keep up with trends. It’s about what works for you and your clients.
Here’s how to approach expansion without feeling overwhelmed:
- Personalize your kit based on your clients’ needs.
- Invest in quality, professional-grade products as your skills improve.
- Don’t feel pressured to buy everything at once—slowly build your kit as you go.
Get Your Beginner Makeup Artist Kit Ready!
Building your pro makeup kit doesn’t have to be overwhelming or expensive. With the right foundation, you can create a kit that has everything you need to start working confidently with clients. Remember, you don’t need every product on the market; focus on the essentials and let your kit grow over time.
Whether you’re starting with a makeup artist beginner kit or learning how to build a makeup kit for beginners, it’s all about making smart choices. Invest in versatile, quality products while staying within your budget. With this guide, you’ll be able to put together a basic makeup kit for beginners on a budget that delivers professional results.
To make things even easier, don’t forget to download my freebie, the Professional Makeup Artist Starter Kit Checklist, and get a head start on building your makeup artist kit for beginners! You’ve got this—now go create some magic!

